This is a FIRST in the 11-year history of RHD!
In the month of December, we did 274 updates to our client's web sites. EVERY SINGLE update done in the month of December was done on the same day that the client requested it. And, to even add to the level of customer service, this was done with only 2/3 of our web division working ha ha...since Carole is out on maternity leave.
So many of our clients comment how much they enjoy working with Christa, Jessica and Carole in the web division. These three ladies make it their personal goal to do each and every update with accuracy, speed, and their own personal touch. They take so much pride in doing a good job for our clients.
As you know, we make customer service a priority here. We feel much of our success is the fact that we are top designers, but we do it with a friendly attitude, high level of service, and the "customer is always right mentality."
Watch for more info on our updates report for 2010 and our "guess the updates" contest coming soon.
Jumat, 31 Desember 2010
Perenungan Di Ambang Pergantian Rotasi Waktu
Tik....tik.....tik.....
Tik....tik.....tik.....
Tik....tik.....tik.....
Tik....tik.....tik.....
Selirih bunyinya, setajam rasanya
ketika melihat dentuman waktu terhela
Hey!
Detik, jam, hari, minggu, bulan, dan....tahun
Melintas bagai cahaya, berranjak di dalam lamun
Ini tahun hampir berlalu
Matahari segera kembali ke awal baru
Tengok ke belakang
Tawakah?
Lepaskan, lampiaskan
Kamis, 30 Desember 2010
30 Fakta Aneh dan Ga Penting Tapi Penting Untuk Diketahui
Sebelumnya, kira-kira bingung ga ya baca judulnya? Maksud ane tuh, fakta-fakta (dan emang bener-bener fakta) dunia ini emang ga gitu penting tapi aneh. Saking anehnya, maka penting banget untuk kita ketahui. [Sigh...] Malah tambah bikin bingung ya? Hahaha! kalo gitu langsung baca aja deh, ini nih fakta-faktanya:
Kumbang memiliki rasa seperti buah apel, tawon (lebah besar) rasanya seperti biji
Kumbang memiliki rasa seperti buah apel, tawon (lebah besar) rasanya seperti biji
Untuk Mereka yang Tak Lelah Berkata Indah
Sepertinya malam segera beranjak
Lepas sudah tempat berpijak
Pernaungan ini tak lagi membekas jejak
Meski tertulis beribu sajak....
Kelu lidahku untuk mengulas kata
Karena duniaku tak lagi berjuta
Ini aku dan nyata
Tak lagi bersahabat dengan tinta
Kawanku, bukan aku ingin menghilang
bukan aku ingin menghalang
Cintaku, Ada saat dunia bertanya
Dan aku mesti
Rabu, 29 Desember 2010
Tips Mengetahui Pencuri Konten Artikel Blog
Artikel ini ditulis karena saya banyak mendengar dari teman-teman blogger yang mengeluh karena konten-konten hasil karyanya sendiri banyak yang telah disalin utuh tanpa meninggalkan jejak link apapun. Sebenarnya banyak blogger yg tidak mempermasalahkan hal ini, namun sebagian blogger lainnya sangat merasa bahwa ini sebuah pelanggaran, karena tulisan-tulisan yang dibuat itu bukanlah hasil
Selasa, 28 Desember 2010
Menulis Artikel Blog Sendiri, Gimana Caranya Ya?
Hmmmm, artikel.... Kata ini sudah sangat lazim dan akrab bagi telinga para blogger.
Artikel blog memiliki jenis bermacam-macam, tergantung dari konteks dan tujuan blog yang dibawa. Hal ini nantinya berpengaruh terhadap tipe artikel yang hendak diusung dalam blog.
Apapun Blognya, Artikel Makanannya!
Menulis artikel adalah makanan sehari-hari yg tak terelakkan lagi. Dalam sudut pandang tujuan,
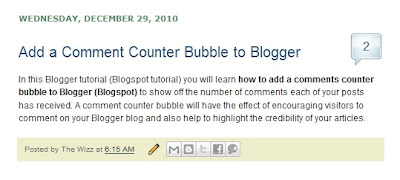
Add a Comments Counter Button to Blogger Blogspot
In this Blogger tutorial (Blogspot tutorial) you will learn how to add a comments counter button to Blogger (Blogspot) to show off the number of comments each of your posts has received.
A comment counter button (bubble) will have the effect of encouraging visitors to comment on your Blogger blog and also help to highlight the credibility of your articles.
Installing this Blogger hack to add a comment counter button only takes a few minutes. The changes needed to add the comment bubble to Blogger while not difficult do involve adding a small snippet of code to your Blogger template in two places. For this reason I strongly urge you to back up your Blogger template before attempting this blogger hack.
How to Add a Comments Counter Bubble to Blogger
A Step-by-Step Walkthrough
The following steps will insert a fully clickable comments counter button on the same line as the post title in Blogger. The comments counter is right aligned by default.
Tips and Troubleshooting
In today's Blogger tutorial I have covered how to add a comments counter to a Blogger blog (blogspot blog) that will appear to the right of your blog post title. A comments counter is a way to encourage visitors to comment and is a way of showing off the credibility of your blog posts. Good luck! Any comments about installing this blogger hack are most welcome.
Related Articles
List of Blog Know How Tutorials for Blogger Blogs
Tips to Add Digg Button to Blogger Blogspot
Add Twitter Followers Counter to Blogger
Add Twitter Badge or Button to Blogger
Add a Social Bookmarking Button to Blogger
Add Social Bookmark Buttons to Blogger
A comment counter button (bubble) will have the effect of encouraging visitors to comment on your Blogger blog and also help to highlight the credibility of your articles.

Installing this Blogger hack to add a comment counter button only takes a few minutes. The changes needed to add the comment bubble to Blogger while not difficult do involve adding a small snippet of code to your Blogger template in two places. For this reason I strongly urge you to back up your Blogger template before attempting this blogger hack.
Blogger Tutorial Difficulty - easy to medium
How to Add a Comments Counter Bubble to Blogger
A Step-by-Step Walkthrough
The following steps will insert a fully clickable comments counter button on the same line as the post title in Blogger. The comments counter is right aligned by default.
- Log in to Blogger and the blog you wish to apply these changes to
- Select Design > Edit HTML
- Click on Download Full Template to back up your template before you make any changes
- Check the Expand Widget Templates box
- In the CSS Styling section of your Blogger template and just before the ]]></b:skin>
.comments-button {
width : 48px;
height : 48px;
background : url(https://blogger.googleusercontent.com/img/b/R29vZ2xl/AVvXsEj-k14hzRjRtwRav_sr2oHFeUTUwSUZAjxCPnVG-YF2u5kld-StPkSeR3wQDLGxt4e-qgv0LqXVxF2yj40yXcAuZSusEHwEUCu_rTB2BwmdiDvsYm4cGq9JKRJg9z9hyphenhyphen2oudZycN0xFhevr/s200/comment-counter-bubble.png) no-repeat;
float : right;
font-size : 18px;
margin-top : -15px;
margin-right : 2px;
text-align : center;
padding-top:10px;
} - Now find the following block of code using CTRL key + F
<b:includable id='post' var='post'>
<div class='post hentry uncustomized-post-template'>
<a expr:name='data:post.id'/>
<b:if cond='data:post.title'>
<h3 class='post-title entry-title'>
<b:if cond='data:post.link'>
<a expr:href='data:post.link'><data:post.title/></a> - Copy this code block:
<b:if cond='data:post.allowComments'>
<a class='comments-button' expr:href='data:post.addCommentUrl' expr:onclick='data:post.addCommentOnclick'><data:post.numComments/></a>
</b:if> - Insert as follows:
<b:includable id='post' var='post'>
<div class='post hentry uncustomized-post-template'>
<a expr:name='data:post.id'/>
<b:if cond='data:post.title'>
<h3 class='post-title entry-title'>
<b:if cond='data:post.allowComments'>
<a class='comments-button' expr:href='data:post.addCommentUrl' expr:onclick='data:post.addCommentOnclick'><data:post.numComments/></a>
</b:if>
<b:if cond='data:post.link'>
<a expr:href='data:post.link'><data:post.title/></a> - Save template and then view blog to admire your new comment counter badge.
Tips and Troubleshooting
- If you prefer you can replace the button image I have provided with your own image. You can find other buttons easily enough by doing a Google search with a term like "speech button icons".
 Upload your button to a hosting service such as Photobucket and change the URL address of the image in the CSS styling section. The following example will render a smaller blue button. Note I have reduced the font size to accommodate the change. You may need to play around with the settings to get the font sizing right for your image.
.comments-button {
width : 48px;
height : 48px;
background : url(https://blogger.googleusercontent.com/img/b/R29vZ2xl/AVvXsEjGjca28lzCdaDgWcn00HTV2Mnw2O7PPcDIdfr7XDz-dytWXq26_-tkusYkhiRu_D6fvReFB89_GkLlkvhAnDhiQ9_F_oZbY9FLzQV0GMw5JQPyZ92tqp3Tf3KI68W_6ZcJPiHIiaL4ynR4/s200/comment-counter-bubble-2.png) no-repeat;
float : right;
font-size : 14px;
margin-top : -15px;
margin-right : 2px;
text-align : center;
padding-top:10px;
} - If you want your comment counter to be left aligned instead of right you will need to change the CSS styling from float:right; to float:left;
In today's Blogger tutorial I have covered how to add a comments counter to a Blogger blog (blogspot blog) that will appear to the right of your blog post title. A comments counter is a way to encourage visitors to comment and is a way of showing off the credibility of your blog posts. Good luck! Any comments about installing this blogger hack are most welcome.
Related Articles
List of Blog Know How Tutorials for Blogger Blogs
Tips to Add Digg Button to Blogger Blogspot
Add Twitter Followers Counter to Blogger
Add Twitter Badge or Button to Blogger
Add a Social Bookmarking Button to Blogger
Add Social Bookmark Buttons to Blogger
Senin, 27 Desember 2010
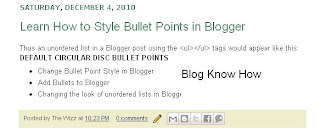
How to Change Bullet Point Style in Blogger (Blogspot) Lists
In Part 1 of this three part series of Blogger tutorials I discuss how to change bullet point styles of lists you may want to include in Blogger posts. This first Blogger tutorial deals with unordered lists and how these can be styled using CSS in Blogger (Blogspot). The second part of these tutorials will deal with ordered lists while part 3 discusses bullet point changes you can make to your sidebar, footer and menus.
Today you will learn how to:
This tutorial is rated easy and is designed so that even Blogger newbies can make the changes they want to their Blogger template. Changing the bullet point style involves changing the CSS styling in your Blogger template (Blogspot template). Join me as I walk you through this step by step guide.
How to Add Bullet Points to a Blogger Post
If you are still using the old Blogger editor you will need to add bullet points manually to any unordered lists you create in Blogger posts. If you are using the new editor the work is done for you. Either way though this is the type of code that generates unordered lists:
Any text can be placed between the two <li></li> tags. Simply copy this list into a Blogger post and substitute your text for mine and you will have an unordered list.
Circular Bullet Points
Circular bullets (also known as markers or discs) are displayed in Blogger by default whenever unordered lists appear. This means that whenever the <ul></ul> tags are used in Blogger posts a leader dot or disc will appear before each line of text denoted by <li>. (Note I will discuss ordered lists <ol></ol> tags in part two of this tutorial).
An unordered list in a Blogger post using the <ul></ul> tags would appear like this:
We can make lots of changes to the look of these filled discs or filled circles by changing the CSS styling in Blogger. For instance we can have squares, or we can choose to have no bullet point at all. Here's how.
To Add Square Bullet Points to Blogger (Blogspot)
The following code will replace the filled circle bullet points with squares instead:
To Add Circle Bullet Points to Blogger (Blogspot)
To add unfilled circle list markers or bullet points to Blogger posts do the following:
How To Indent Bullet Points in Blogger
There are two ways to increase the indentation of list style markers or bullet points.
How To Replace Bullet Points with an Image in Blogger (Blogspot)
Sometimes you may prefer to have an image list marker or icon instead of a bullet point. You will need to host your image somewhere such as a free image hosting service eg Flickr or Photo Bucket. Follow the steps below to replace bullet points in your Blogger posts with an image
How to Remove the Bullet Points from Blogger Posts
If you are going for a minimalist look you may prefer to have no bullet points in the lists in your Blogger posts. In this case:
Related Articles
List of Blog Know How Tutorials for Blogger Blogs
How to Add CSS Styling to Blockquotes in Blogger
How to Add, Delete or Remove Blogger Image Borders
How to Align and Justify Posts in Blogger
How to Add a Divider Between Blogger Posts
How to Add or Change a Background Image in a Blogger Template
Today you will learn how to:
- change the style of bullet points in unordered lists
- add bullet points to unordered lists if they are absent
- add an image instead of a bullet to lists in your Blogger posts
This tutorial is rated easy and is designed so that even Blogger newbies can make the changes they want to their Blogger template. Changing the bullet point style involves changing the CSS styling in your Blogger template (Blogspot template). Join me as I walk you through this step by step guide.
How to Add Bullet Points to a Blogger Post
If you are still using the old Blogger editor you will need to add bullet points manually to any unordered lists you create in Blogger posts. If you are using the new editor the work is done for you. Either way though this is the type of code that generates unordered lists:
<ul><li>Create your own list markers in Blogger</li>
<li>Create unordered lists in Blogger</li>
<li>Create bullet points in Blogger</li>
</ul>
Any text can be placed between the two <li></li> tags. Simply copy this list into a Blogger post and substitute your text for mine and you will have an unordered list.
Circular Bullet Points
Circular bullets (also known as markers or discs) are displayed in Blogger by default whenever unordered lists appear. This means that whenever the <ul></ul> tags are used in Blogger posts a leader dot or disc will appear before each line of text denoted by <li>. (Note I will discuss ordered lists <ol></ol> tags in part two of this tutorial).
An unordered list in a Blogger post using the <ul></ul> tags would appear like this:
- Change Bullet Point Style in Blogger
- Add Bullets to Blogger
- Changing the look of unordered lists in Blogger

We can make lots of changes to the look of these filled discs or filled circles by changing the CSS styling in Blogger. For instance we can have squares, or we can choose to have no bullet point at all. Here's how.
To Add Square Bullet Points to Blogger (Blogspot)
The following code will replace the filled circle bullet points with squares instead:
- Login to Blogger if not already logged in
- From the Dashboard go to Design >Edit HTML
- Back up your template
- Find the posts section of your CSS stylesheet which will be before ]]></b:skin> tag
- For the following default Blogger templates eg "Simple" add the following CSS code to the post section like this
.post ul li {
list-style: square;
}
- Save template and view blog post to see the circular bullet points have been replaced by square ones

To Add Circle Bullet Points to Blogger (Blogspot)
To add unfilled circle list markers or bullet points to Blogger posts do the following:
- Follow steps 1-4 as per square bullets
- Add the following code to the posts section of the CSS stylesheet of your Blogger template by entering the following code:
.post ul li {
list-style: circle;
}
- Save the changes to your template and view a blog post to see the empty circle bullet points

How To Indent Bullet Points in Blogger
There are two ways to increase the indentation of list style markers or bullet points.
- Using the Inside or Outside Element
The indentation of bullet points can be varied using the "inside" element. By default the list will be "outside" unless the "inside element" is used. The following code shifts the indentation of the list further to the right..post ul li {
list-style: circle inside;
}
- Custom Indentation CSS Styling
It is also possible to add custom indentation styling to lists. For instance here I have added a 2.5em indent using the following code to the circles example:.post ul li {
list-style: circle;
margin-left: 2.5em;
}


How To Replace Bullet Points with an Image in Blogger (Blogspot)
Sometimes you may prefer to have an image list marker or icon instead of a bullet point. You will need to host your image somewhere such as a free image hosting service eg Flickr or Photo Bucket. Follow the steps below to replace bullet points in your Blogger posts with an image
- Follow steps 1-4 as per square bullets
- In the CSS styling of the posts section of your Blogger template and before the </head> insert the following code:
.post ul li {
list-style: url("http://URLaddressofImage.gif");
} - Replace URLaddressofImage with the URL address of the image you have uploaded to an image hosting service. Note in most cases the file will have a .gif extension. If the extension is anything other than .gif you will need to change this too.

- Save the changes to your Blogger template and navigate to a post page to see your image list marker installed

How to Remove the Bullet Points from Blogger Posts
If you are going for a minimalist look you may prefer to have no bullet points in the lists in your Blogger posts. In this case:
- Follow steps 1-4 as per square bullets
- In the CSS styling of the posts section of your Blogger template and before the </head> insert the following code:
.post ul li {
list-style: none;
}

Related Articles
List of Blog Know How Tutorials for Blogger Blogs
How to Add CSS Styling to Blockquotes in Blogger
How to Add, Delete or Remove Blogger Image Borders
How to Align and Justify Posts in Blogger
How to Add a Divider Between Blogger Posts
How to Add or Change a Background Image in a Blogger Template
Memperindah Kotak Comment Blogger/Blogspot Dengan CSS
Cara ini saya dapat setelah sedikit belajar otak-atik CSS dengan teman karena pengen banget membuat kotak comment (yang sebelumnya terkesan "biasa" di dalam template Blogger ini) terlihat lebih "berwarna" dan "senada" dengan warna template blog ini.
Akhirnya kita menggunakan konsep frame untuk menghias sekeliling kotak comment tersebut. Caranya pun sangat sederhana dan mudah. Berikut
Akhirnya kita menggunakan konsep frame untuk menghias sekeliling kotak comment tersebut. Caranya pun sangat sederhana dan mudah. Berikut
Sabtu, 25 Desember 2010
FACEBOOK WARNING!: Jangan Klik "Seorang Gadis Bunuh Diri Karena Status Ayahnya"
Sebelumnya, saya baru saja menemui kondisi ganjil dan mencurigakan setelah terus-terusan mendapat pop up chat dari account teman saya yang berbunyi begini:"Is this you?"Kemudian di bawahnya ada link aplikasi yang disisipkan:http://facebook.com/xxxxxxxxxxxxxxx Begitu terus hingga berkali-kali. Setelah saya buka, aplikasi ini tidak jelas sebagai aplikasi apa dan terlihat aneh karena meminta banyak
18 Fakta dan Dampak Facebook yang Mungkin Anda Belum Tahu
Seperti yang sudah banyak diketahui, Facebook adalah situs social network yang memiliki user terbanyak di dunia. Ada beberapa hal yang menarik yang patut kita ketahui dibalik hingar-bingar dan popularitas situs jejaring temuan Mark Zuckerberg ini, diantaranya adalah:Jika Facebook adalah sebuah negara, maka Facebook adalah negara terbesar kelima setelah Cina, India, Amerika, dan
Free Sitemap Submitter | SEO Tools
Sitemap (peta situs) merupakan rujukan bagi search engine dalam melakukan crawling sebuah website/blog. Maka, proses indeks menjadi lebih cepat dan tidak ada url/halaman yang terlewatkan oleh spiderbot (robot crawler). Tentu saja, sitemap kemudian menjadi sangat penting bagi usaha peningkatan SEO.
Sitemap submitter dapat memperpendek waktu kerja pendaftaran sitemap blog/web ke beberapa search
Jumat, 24 Desember 2010
30 Fakta Menarik Seputar Dunia Internet
Mungkin sebagian fakta atau trivia di bawah ini sudah anda ketahui, tetapi tetaplah fakta-fakta ini menarik dan bisa memberi gambaran ke kita mengenai dunia internet sesungguhnya. Ini dia:
Penemu frase World Wide Web (WWW) adalah Tim-Berners-Lee pada tahun 1990.
Penyebaran Internet di dunia dengan capaian 50 juta pengguna adalah yang tercepat, yaitu hanya dalam 5 tahun, dibanding radio
Penemu frase World Wide Web (WWW) adalah Tim-Berners-Lee pada tahun 1990.
Penyebaran Internet di dunia dengan capaian 50 juta pengguna adalah yang tercepat, yaitu hanya dalam 5 tahun, dibanding radio
Cara Membuat Blog Gratis di Blogger/Blogspot & WordPress
Cara membuat blog sekarang ini jauh lebih mudah. Memulai blog dengan layanan dua raksasa blogging: Blogger dan WordPress, merupakan awalan yg baik. Meskipun ada puluhan situs penyedia layanan dan hosting blog gratis lainnya di seluruh dunia.
Blog semakin menjadi media ekspresi di internet yang paling booming. Ada jutaan blogger di dunia; rata-rata memilki eksistensi yg bisa dibilang bagus.
Paket Internet Unlimited GSM Three (3), Lemot kah?
(Review Paket Internet Unlimited GSM Three pada ZTE MF-100 GSM USB MODEM)Berbagai macam paket internet unlimited ditawarkan oleh berbagai operator/provider di Indonesia, baik yang berbasis CDMA ataupun GSM, dengan harga paket yang beraneka macam dan dengan kelebihan serta kelemahannnya masing-masing.
Kali ini saya ingin mereview Paket Internet Unlimited Three. Pada dasarnya saya belum
Kali ini saya ingin mereview Paket Internet Unlimited Three. Pada dasarnya saya belum
Cara Mempercepat Koneksi Internet Speedy
Mungkin banyak yg berlangganan speedy (terutama paket personal) mengeluh karena koneksinya yg saat ini terhitung lambat.Namun jangan kawatir, saya memiliki beberapa tips yg saya dapat dari hasil browsing serta informasi yg saya dapat dari teman-teman blog lainnya. Cara ini sudah berhasil saya terapkan untuk mempercepat koneksi speedy saya.Salah satu caranya adalah dengan mengutak atik
Rahasia: Fungsi Lain Google Search Engine
Banyak dari kita menggunakan mesin pencari Google sehari-hari tetapi apakah anda tahu bahwa google juga merupakan alat yang ampuh untuk hal-hal lain? Ada beberapa trik sederhana namun hebat hasilnya yg dapat digunakan ketika mencari dengan menggunakan fitur-fitur Google. Kita lihat yuk!
1. Gunakan Google sebagai kalkulator.Google telah memiliki built-in calculator, dengan memasukkan
1. Gunakan Google sebagai kalkulator.Google telah memiliki built-in calculator, dengan memasukkan
Kamis, 23 Desember 2010
3 Cara Membuat Artikel Blog Dalam 10 Menit
Mungkin sobat tidak percaya setelah membaca judul dari posting ini. Masa sih membuat artikel blog hanya dalam waktu 10 menit? Tapi saya akan berusaha sekuat tenaga hingga bisa meyakinkan 100 persen dengan 3 cara berbeda berikut ini:
1. Cari artikel-artikel blog mancanegara atau news terbaru, pilih artikel yg menurut sobat menarik banyak pembaca. Tidak perlu membaca isinya karena itu akan
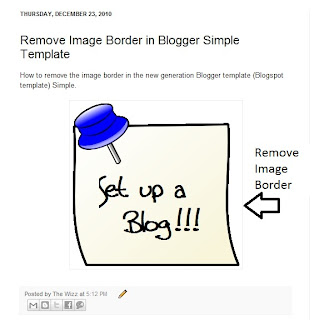
Remove Image Border in Default Blogger Templates Simple and Awesome Inc
In this Blogger tutorial I show you how to remove the border around images in Blogger posts (Blogspot posts) when using one of the latest default Blogger templates Simple or Awesome Inc.
Below I explore two methods of removing or deleting image borders in the Blogger template Simple. The first method shows you how to remove the image border using Template Designer and the second method outlined describes how to remove the image border manually by changing the code.
Method 1 - Use Template Designer to Remove Image Border in Blogger
Method 2 - Change Template Code to Manually Remove Image Border from the New Default Blogger Templates
In this Blogger tutorial (Blogspot tutorial) I have shown you how to remove or delete the border around images in Blogger posts for the newest generation of default Blogger templates Simple and Awesome Inc. I have discussed two different methods to remove the border around the images either by adjusting the settings in the Blogger Template Designer or by manually changing the code of the variable in the CSS styling section of the default Blogger template
Related Articles
List of Blog Know How Tutorials for Blogger Blogs
How to Change or Remove Blogger Image Borders (Part 1)
How to Change the Blog Title Border in Blogger Minima Template
How to Add CSS Styling to Blockquotes in Blogger
How to Align and Justify Posts in Blogger
How to Add a Divider Between Blogger Posts
How to Add or Change a Background Image in a Blogger Template
If you are using an older generation Blogger template or a custom template the solutions contained in this article may work for you however it is more likely that you will need to follow the methods to remove image borders outlined in my previous Blogger tutorial Change or Remove Blogger Image Borders (Part 1)
Below I explore two methods of removing or deleting image borders in the Blogger template Simple. The first method shows you how to remove the image border using Template Designer and the second method outlined describes how to remove the image border manually by changing the code.

Method 1 - Use Template Designer to Remove Image Border in Blogger
- From the Blogger Dashboard go to Design > Template Designer
- Then select Advanced > Images
- Under Border Color use the drop down arrow to open the color palette
- Change the setting to transparent by checking the small box on the bottom right hand side marked "transparent"

Note: If you are using the black version of the Awesome Inc template you will need to change the Background Color to transparent too. Click on the down arrow of the color palette and select transparent.
- Click Apply to Blog to save your changes to the template
- Navigate to any post page to view images in posts without the border


Method 2 - Change Template Code to Manually Remove Image Border from the New Default Blogger Templates
- From the Blogger Dashboard go to Design > Edit HTML
- Back up your Blogger template
- Find this line amongst the declared variables at the top of your template
<Variable name="image.border.color" description="Border Color" type="color" default="transparent" value="#cccccc"/>
- Change to the value of the border color to transparent like so
<Variable name="image.border.color" description="Border Color" type="color" default="transparent" value="transparent"/>
- Save your changes to the template
- Navigate to any post page that has an image and see that the border around the image is no longer visible
In this Blogger tutorial (Blogspot tutorial) I have shown you how to remove or delete the border around images in Blogger posts for the newest generation of default Blogger templates Simple and Awesome Inc. I have discussed two different methods to remove the border around the images either by adjusting the settings in the Blogger Template Designer or by manually changing the code of the variable in the CSS styling section of the default Blogger template
Related Articles
List of Blog Know How Tutorials for Blogger Blogs
How to Change or Remove Blogger Image Borders (Part 1)
How to Change the Blog Title Border in Blogger Minima Template
How to Add CSS Styling to Blockquotes in Blogger
How to Align and Justify Posts in Blogger
How to Add a Divider Between Blogger Posts
How to Add or Change a Background Image in a Blogger Template
Rabu, 22 Desember 2010
Deja Vu: Mimpi Atau Kenyataan ya?
Sepertinya kata deja vu sudah tidak begitu asing bagi telinga kita. Bahkan kita tidak jarang membicarakan fenomena ini dengan teman-teman kita. Suatu ketika, dalam suatu kesempatan, mungkin kita atau salah satu dari teman kita nyeletuk, "Eh, tau gak, rasanya kok aku kaya udah pernah ngalamin ini ya sebelumnya. Persis banget loh! Aku kaya udah pernah duduk persis di kursi ini, kamu di depanku,,dan
Senin, 20 Desember 2010
8 Alasan Mengapa Kita Harus Punya Account Facebook
(Artikel ini dibuat berdasarkan pengalaman pribadi, maksudnya pengalaman orang bernama lengkap Pribadi Sekali. Enjoy!)
Facebook menjadi sebuah account wajib dipunyai? Kenapa enggak? Berikut setidaknya 8 alasan penguat mengapa sobat Blogger semua harus punya account Facebook. Tentunya selain buat sharing Artikel n Blog yah. Hehe, selamat menikmati.
1. Gratis. Kata ini selalu berada di rating
Facebook menjadi sebuah account wajib dipunyai? Kenapa enggak? Berikut setidaknya 8 alasan penguat mengapa sobat Blogger semua harus punya account Facebook. Tentunya selain buat sharing Artikel n Blog yah. Hehe, selamat menikmati.
1. Gratis. Kata ini selalu berada di rating
Minggu, 19 Desember 2010
9 Fakta Unik & Menarik dalam Dunia Sepakbola
Berikut adalah fakta-fakta menarik. unik, sekaligus lucu dari dunia sepak bola. Sebenarnya ada banyak lagi, tetapi kalo dimasukkkan di dalam list tidak akan selesai dan terus bertambah. Trivia di bawah ini adalah sebagian kecil dari banyak item yg saya kumpulkan dari sumber-sumber mancanegara. Semoga tidak repost (hehe, kaya bahasa forum aja. :D ). Selamat menikmati!
1. Tayangan sepakbola pertama
1. Tayangan sepakbola pertama
Sabtu, 18 Desember 2010
9 Fakta Tentang Kandungan Buah Anggur dan Manfaatnya
JIKA anda adalah orang yang sangat memperhatikan kesehatan, maka mengetahui nilai kandungan gizi buah anggur sangatlah penting. Selain memiliki rasa manis dan segar, anggur mengandung banyak vitamin, mineral, & antioksidan. Berikut beberapa fakta buah anggur yg mungkin belum banyak diketahui:
Anggur memiliki banyak kandungan antioksidan seperti antosianin, flavonol, geraniol, linalol, nerol dan
Kamis, 16 Desember 2010
BidVertiser: Cara Mudah Dapat Uang dari Blog/Web
Membuat blog kita menjadi ladang uang memang gampang-gampang susah. Program PPC (Paid Per Click) memang bisa dibilang sebagai program paling gampang sebagai alat untuk mencari uang . Yang paling terkenal adalah Google Adsense. Namun program satu ini emang menggemaskan, karena tidak gampang untuk mendapatkan approve (atau istilahnya ijin) dari Google untuk menjadi salah satu Publisher (baca:
Senin, 13 Desember 2010
Motivasi: Menyusun & Merangkai Langkah Masa Depan
Setiap pribadi adalah unik. Setiap pribadi adalah menarik. Bahkan ketika kita melihat diri kita sebagai jiwa yang lelah, masih ada celah pemantik: hati yang selalu bersenandung dalam perih yang menggigit.
Semua ada setapaknya, dengan liku yang tak berbatas, dengan lebar yang tak terukur, dengan lubang yang tak terduga.
Namun pasti ada penunjuknya.
Jiwa yang lelah bukan berarti jiwa yang sakit.
Semua ada setapaknya, dengan liku yang tak berbatas, dengan lebar yang tak terukur, dengan lubang yang tak terduga.
Namun pasti ada penunjuknya.
Jiwa yang lelah bukan berarti jiwa yang sakit.
Jumat, 10 Desember 2010
Cara Memasang Meta Tags di Blogger/Blogspot
Meta tag berfungsi untuk memberikan informasi kepada search engine mengenai gambaran dan isi suatu blog/website. Blogspot/Blogger dengan template bawaan/official biasanya belum memiliki meta tag ini, oleh karena itu, untuk mengoptimalkan pencarian di search engine (SEO), meta tag perlu ditambahkan.
Meta Tag Description
Meta tag description digunakan untuk memberikan gambaran umum mengenai isi
Meta Tag Description
Meta tag description digunakan untuk memberikan gambaran umum mengenai isi
Cara Memasang / Meletakkan Widget Berdampingan
Banyak dari kita para blogger yang ingin widget kita terpasang dengan baik, tidak memakan tempat terlalu panjang, sehingga enak dilihat dan terkesan rapi. Salah satu caranya adalah dengan membuat susunan widget tersebut secara berdampingan.
Secara singkat kita bisa menyusun widget berdampingan dengan memasang kode HTML tabel.Berikut ini kodenya:
Secara singkat kita bisa menyusun widget berdampingan dengan memasang kode HTML tabel.Berikut ini kodenya:
| kode widget | kode widget
Kamis, 09 Desember 2010Cara Membuat Read More/Baca Selanjutnya di Blogger dan Wordpress
Suatu posting utuh yang memakan tempat terlalu panjang di halaman utama terkadang membuat pengunjung merasa tidak sabar. Padahal mereka ingin segera melihat daftar posting yang lain di bawahnya. Pengunjung tidak mau tahu tentang hal ini, walaupun mungkin di sidebar halaman tersebut terdapat ruang navigasi untuk daftar posting, kategori, dan lain-lain yang bisa membawa pengunjung ke judul posting
Senin, 06 Desember 2010Recent Ads for Cattle Visions
Last week we talked about contract discounts for clients who book all of their print advertising through RHD, and one of those volume clients we work with is Cattle Visions, http://www.cattlevisions.com/. We just wrapped up two monthly ads for Cattle Visions that will appear in the January 2011 Angus Journal. Check it out and see what you think! As a reminder, our volume discount applies to those clients running at least 6 print ads through RHD in calendar year 2011, and the pricing gets better the more ads you hire us to do.
  How to Remove or Change the Blog Title Border in Blogger (Blogspot) - Minima Template
In this Blogger tutorial I discuss how to change the blog title border color or remove the border in a Blogger template (Blogspot template) by changing either the CSS styling of the border manually or by using the Blogger Template Designer feature.
Lots of bloggers have updated their Blogger template to the new default series of Blogger templates for 2010. There are however many of you who are still using the default Minima template from 2006 (and there are lots of good reasons to do so) so this tutorial is for you and anyone else who is using a custom Blogger template based on Minima. You will learn how to change the border styling around the blog title to suit your individual requirements. You can either change the border color or remove the border altogether. If you want to remove the border around images in Blogger posts (Blogspot posts) then please refer to my Blogger tutorial How to Add, Change or Remove the Border Image in Blogger Posts Remove or Change the Blog Title Border in Blogger (Blogspot) There are two simple ways to remove the border around the blog title in Blogger. We are going to hide the border rather than actually remove the code that creates it by making the border color transparent. I will also show you how to change the border color. Method 1 discusses how to do this using the Blogger Template Designer while Method 2 describes how to change the blog title border manually by changing the code.  Method 1 - Using Blogger Template Designer
Method 2 If the Blogger Template Designer is not working on your template for some reason you can tweak the code in your template to remove the border around the blog title
Tips and Troubleshooting Below are some tips to help you further customize the blog title border width. You can either remove the inner border, thicken the outer border or thicken both borders around the blog title in Blogger.
In this Blogger tutorial you have learned two methods to change the color of the border around a blog title in Blogger blog (Blogspot blog). I have also shown you how to increase the size of the border width. This tutorial applies particularly to the default Blogger template Minima but also is relevant for any blogger using a custom Blogger template based on Minima. Good luck! Related Articles List of Blog Know How Tutorials for Blogger Blogs How to Add CSS Styling to Blockquotes in Blogger How to Add, Delete or Remove Blogger Image Borders How to Align and Justify Posts in Blogger How to Add a Divider Between Blogger Posts How to Add or Change a Background Image in a Blogger Template Sabtu, 04 Desember 2010List Pencuri Konten Buka-Rahasia.Blogspot.comPost ini dintensikan sebagai bagian dari daftar lengkap blog-blog yang memuat artikel-artikel buka-rahasia.blogspot.com tanpa memberikan linkback / tidak me-linkback dengan benar. Apapun tujuan dan alasannya, memuat dan mengakui karya orang lain adalah pelanggaran hukum dan norma. Secara etis, blogging ditujukan untuk menyampaikan kreativitas menulis. Saya sangat memerangi copas tanpa link Jumat, 03 Desember 20102011 Ad Contracts - Volume Discounts
We just started working on lots of ads for the January 2011 publications, hard to believe it's almost 2011!
If you are planning on running at least 6 ads in 2011, talk to us about volume discount pricing on RHD handling all of your print advertising needs. We offer two levels of bulk discounts for clients depending on the # of print ads you plan on using in 2011. Our volume ad pricing range from 15% to 33% off from our regular pricing, as a way to reward those clients who do lots of business with us and use RHD for ALL of their print advertising needs. If you're interested in learning more, talk to Rachel, Tricia or Stacey Forgason at 979-532-9141 and we'll be glad to discuss the contract pricing with you! Kamis, 02 Desember 2010November Updates Report
Each month I like to brag on the wonderful ladies in the RHD web division, and this month is no different. We like to keep our clients (and potential clients) informed of our quality of work in web updates to help illustrate the huge commitment we have to providing the best customer service in the business.
In the month of November, our web division handled 414 update request, that's an average of about 20 per day. 95% of all updates were completed on the same day the client requested them. The average turnaround time was 45 minutes. Of the 5% of people that didn't get their update done on the same day, they were done on the very next day, and all of these were all ones sent in over the Thanksgiving holiday when we were closed. So technically, they were done on the very first day we opened back up. There's a lot of things that help make RHD the best in the business. First of all, our design quality is tops. But we realize there are a lot of designers out there, and we feel that our quality of work COMBINED with our service is what makes RHD excel. We have a friendly staff who is all here to assist you. Even with 400 web site clients, each person's web site is a priority for us, which you can clearly see here by the 45 minute average turnaround on web sites. If you've been thinking about trying RHD, give us a call! We'd love to start doing a web site (or any other project) for you! 979-532-9141. Rabu, 01 Desember 2010Best of the Barns 2010 AwardsHere's how it works.... Each year we will be hosting the Best of the Barns awards program. This year there are 30 categories ranging from Livestock Friend of the Year to Best Way to Kill Time at the Barn. The questions are tailored to the national livestock show industry, but most of the focus is on cattle and hogs. For the first year, we determined the categories from a consensus of our expert consultant panel, who helped us create the categories and questions. So, if we missed something, feel free to write it in. For future years, we'll be happy to add any categories or responses that our fans suggest. So here's how you vote! In the style of modern reality shows, you can vote a few times. First, you can complete the entire survey at once by visiting http://www.bestofthebarns.com/ and clicking on the online survey link. Only one response per computer. We will also have voting going on daily at the RHD facebook page. Each day we will post one of the categories and our fans can "LIKE" the choice they want to vote for. Voting is open December 1-31. Results will be tabulated and announced in January. The winners in 2010 will receive a winners media kit including logos and other tools to use in their marketing campaigns. So feel free to share the news with your friends and let's honor those who are the BEST OF THE BARNS in 2010!
Langganan:
Postingan (Atom)
|


