This is a FIRST in the 11-year history of RHD!
In the month of December, we did 274 updates to our client's web sites. EVERY SINGLE update done in the month of December was done on the same day that the client requested it. And, to even add to the level of customer service, this was done with only 2/3 of our web division working ha ha...since Carole is out on maternity leave.
So many of our clients comment how much they enjoy working with Christa, Jessica and Carole in the web division. These three ladies make it their personal goal to do each and every update with accuracy, speed, and their own personal touch. They take so much pride in doing a good job for our clients.
As you know, we make customer service a priority here. We feel much of our success is the fact that we are top designers, but we do it with a friendly attitude, high level of service, and the "customer is always right mentality."
Watch for more info on our updates report for 2010 and our "guess the updates" contest coming soon.
Jumat, 31 Desember 2010
Perenungan Di Ambang Pergantian Rotasi Waktu
Tik....tik.....tik.....
Tik....tik.....tik.....
Tik....tik.....tik.....
Tik....tik.....tik.....
Selirih bunyinya, setajam rasanya
ketika melihat dentuman waktu terhela
Hey!
Detik, jam, hari, minggu, bulan, dan....tahun
Melintas bagai cahaya, berranjak di dalam lamun
Ini tahun hampir berlalu
Matahari segera kembali ke awal baru
Tengok ke belakang
Tawakah?
Lepaskan, lampiaskan
Kamis, 30 Desember 2010
30 Fakta Aneh dan Ga Penting Tapi Penting Untuk Diketahui
Sebelumnya, kira-kira bingung ga ya baca judulnya? Maksud ane tuh, fakta-fakta (dan emang bener-bener fakta) dunia ini emang ga gitu penting tapi aneh. Saking anehnya, maka penting banget untuk kita ketahui. [Sigh...] Malah tambah bikin bingung ya? Hahaha! kalo gitu langsung baca aja deh, ini nih fakta-faktanya:
Kumbang memiliki rasa seperti buah apel, tawon (lebah besar) rasanya seperti biji
Kumbang memiliki rasa seperti buah apel, tawon (lebah besar) rasanya seperti biji
Untuk Mereka yang Tak Lelah Berkata Indah
Sepertinya malam segera beranjak
Lepas sudah tempat berpijak
Pernaungan ini tak lagi membekas jejak
Meski tertulis beribu sajak....
Kelu lidahku untuk mengulas kata
Karena duniaku tak lagi berjuta
Ini aku dan nyata
Tak lagi bersahabat dengan tinta
Kawanku, bukan aku ingin menghilang
bukan aku ingin menghalang
Cintaku, Ada saat dunia bertanya
Dan aku mesti
Rabu, 29 Desember 2010
Tips Mengetahui Pencuri Konten Artikel Blog
Artikel ini ditulis karena saya banyak mendengar dari teman-teman blogger yang mengeluh karena konten-konten hasil karyanya sendiri banyak yang telah disalin utuh tanpa meninggalkan jejak link apapun. Sebenarnya banyak blogger yg tidak mempermasalahkan hal ini, namun sebagian blogger lainnya sangat merasa bahwa ini sebuah pelanggaran, karena tulisan-tulisan yang dibuat itu bukanlah hasil
Selasa, 28 Desember 2010
Menulis Artikel Blog Sendiri, Gimana Caranya Ya?
Hmmmm, artikel.... Kata ini sudah sangat lazim dan akrab bagi telinga para blogger.
Artikel blog memiliki jenis bermacam-macam, tergantung dari konteks dan tujuan blog yang dibawa. Hal ini nantinya berpengaruh terhadap tipe artikel yang hendak diusung dalam blog.
Apapun Blognya, Artikel Makanannya!
Menulis artikel adalah makanan sehari-hari yg tak terelakkan lagi. Dalam sudut pandang tujuan,
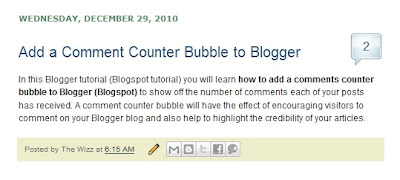
Add a Comments Counter Button to Blogger Blogspot
In this Blogger tutorial (Blogspot tutorial) you will learn how to add a comments counter button to Blogger (Blogspot) to show off the number of comments each of your posts has received.
A comment counter button (bubble) will have the effect of encouraging visitors to comment on your Blogger blog and also help to highlight the credibility of your articles.
Installing this Blogger hack to add a comment counter button only takes a few minutes. The changes needed to add the comment bubble to Blogger while not difficult do involve adding a small snippet of code to your Blogger template in two places. For this reason I strongly urge you to back up your Blogger template before attempting this blogger hack.
How to Add a Comments Counter Bubble to Blogger
A Step-by-Step Walkthrough
The following steps will insert a fully clickable comments counter button on the same line as the post title in Blogger. The comments counter is right aligned by default.
Tips and Troubleshooting
In today's Blogger tutorial I have covered how to add a comments counter to a Blogger blog (blogspot blog) that will appear to the right of your blog post title. A comments counter is a way to encourage visitors to comment and is a way of showing off the credibility of your blog posts. Good luck! Any comments about installing this blogger hack are most welcome.
Related Articles
List of Blog Know How Tutorials for Blogger Blogs
Tips to Add Digg Button to Blogger Blogspot
Add Twitter Followers Counter to Blogger
Add Twitter Badge or Button to Blogger
Add a Social Bookmarking Button to Blogger
Add Social Bookmark Buttons to Blogger
A comment counter button (bubble) will have the effect of encouraging visitors to comment on your Blogger blog and also help to highlight the credibility of your articles.

Installing this Blogger hack to add a comment counter button only takes a few minutes. The changes needed to add the comment bubble to Blogger while not difficult do involve adding a small snippet of code to your Blogger template in two places. For this reason I strongly urge you to back up your Blogger template before attempting this blogger hack.
Blogger Tutorial Difficulty - easy to medium
How to Add a Comments Counter Bubble to Blogger
A Step-by-Step Walkthrough
The following steps will insert a fully clickable comments counter button on the same line as the post title in Blogger. The comments counter is right aligned by default.
- Log in to Blogger and the blog you wish to apply these changes to
- Select Design > Edit HTML
- Click on Download Full Template to back up your template before you make any changes
- Check the Expand Widget Templates box
- In the CSS Styling section of your Blogger template and just before the ]]></b:skin>
.comments-button {
width : 48px;
height : 48px;
background : url(https://blogger.googleusercontent.com/img/b/R29vZ2xl/AVvXsEj-k14hzRjRtwRav_sr2oHFeUTUwSUZAjxCPnVG-YF2u5kld-StPkSeR3wQDLGxt4e-qgv0LqXVxF2yj40yXcAuZSusEHwEUCu_rTB2BwmdiDvsYm4cGq9JKRJg9z9hyphenhyphen2oudZycN0xFhevr/s200/comment-counter-bubble.png) no-repeat;
float : right;
font-size : 18px;
margin-top : -15px;
margin-right : 2px;
text-align : center;
padding-top:10px;
} - Now find the following block of code using CTRL key + F
<b:includable id='post' var='post'>
<div class='post hentry uncustomized-post-template'>
<a expr:name='data:post.id'/>
<b:if cond='data:post.title'>
<h3 class='post-title entry-title'>
<b:if cond='data:post.link'>
<a expr:href='data:post.link'><data:post.title/></a> - Copy this code block:
<b:if cond='data:post.allowComments'>
<a class='comments-button' expr:href='data:post.addCommentUrl' expr:onclick='data:post.addCommentOnclick'><data:post.numComments/></a>
</b:if> - Insert as follows:
<b:includable id='post' var='post'>
<div class='post hentry uncustomized-post-template'>
<a expr:name='data:post.id'/>
<b:if cond='data:post.title'>
<h3 class='post-title entry-title'>
<b:if cond='data:post.allowComments'>
<a class='comments-button' expr:href='data:post.addCommentUrl' expr:onclick='data:post.addCommentOnclick'><data:post.numComments/></a>
</b:if>
<b:if cond='data:post.link'>
<a expr:href='data:post.link'><data:post.title/></a> - Save template and then view blog to admire your new comment counter badge.
Tips and Troubleshooting
- If you prefer you can replace the button image I have provided with your own image. You can find other buttons easily enough by doing a Google search with a term like "speech button icons".
 Upload your button to a hosting service such as Photobucket and change the URL address of the image in the CSS styling section. The following example will render a smaller blue button. Note I have reduced the font size to accommodate the change. You may need to play around with the settings to get the font sizing right for your image.
.comments-button {
width : 48px;
height : 48px;
background : url(https://blogger.googleusercontent.com/img/b/R29vZ2xl/AVvXsEjGjca28lzCdaDgWcn00HTV2Mnw2O7PPcDIdfr7XDz-dytWXq26_-tkusYkhiRu_D6fvReFB89_GkLlkvhAnDhiQ9_F_oZbY9FLzQV0GMw5JQPyZ92tqp3Tf3KI68W_6ZcJPiHIiaL4ynR4/s200/comment-counter-bubble-2.png) no-repeat;
float : right;
font-size : 14px;
margin-top : -15px;
margin-right : 2px;
text-align : center;
padding-top:10px;
} - If you want your comment counter to be left aligned instead of right you will need to change the CSS styling from float:right; to float:left;
In today's Blogger tutorial I have covered how to add a comments counter to a Blogger blog (blogspot blog) that will appear to the right of your blog post title. A comments counter is a way to encourage visitors to comment and is a way of showing off the credibility of your blog posts. Good luck! Any comments about installing this blogger hack are most welcome.
Related Articles
List of Blog Know How Tutorials for Blogger Blogs
Tips to Add Digg Button to Blogger Blogspot
Add Twitter Followers Counter to Blogger
Add Twitter Badge or Button to Blogger
Add a Social Bookmarking Button to Blogger
Add Social Bookmark Buttons to Blogger
Senin, 27 Desember 2010
How to Change Bullet Point Style in Blogger (Blogspot) Lists
In Part 1 of this three part series of Blogger tutorials I discuss how to change bullet point styles of lists you may want to include in Blogger posts. This first Blogger tutorial deals with unordered lists and how these can be styled using CSS in Blogger (Blogspot). The second part of these tutorials will deal with ordered lists while part 3 discusses bullet point changes you can make to your sidebar, footer and menus.
Today you will learn how to:
This tutorial is rated easy and is designed so that even Blogger newbies can make the changes they want to their Blogger template. Changing the bullet point style involves changing the CSS styling in your Blogger template (Blogspot template). Join me as I walk you through this step by step guide.
How to Add Bullet Points to a Blogger Post
If you are still using the old Blogger editor you will need to add bullet points manually to any unordered lists you create in Blogger posts. If you are using the new editor the work is done for you. Either way though this is the type of code that generates unordered lists:
Any text can be placed between the two <li></li> tags. Simply copy this list into a Blogger post and substitute your text for mine and you will have an unordered list.
Circular Bullet Points
Circular bullets (also known as markers or discs) are displayed in Blogger by default whenever unordered lists appear. This means that whenever the <ul></ul> tags are used in Blogger posts a leader dot or disc will appear before each line of text denoted by <li>. (Note I will discuss ordered lists <ol></ol> tags in part two of this tutorial).
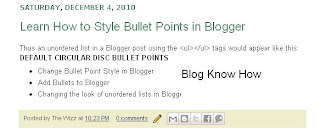
An unordered list in a Blogger post using the <ul></ul> tags would appear like this:
We can make lots of changes to the look of these filled discs or filled circles by changing the CSS styling in Blogger. For instance we can have squares, or we can choose to have no bullet point at all. Here's how.
To Add Square Bullet Points to Blogger (Blogspot)
The following code will replace the filled circle bullet points with squares instead:
To Add Circle Bullet Points to Blogger (Blogspot)
To add unfilled circle list markers or bullet points to Blogger posts do the following:
How To Indent Bullet Points in Blogger
There are two ways to increase the indentation of list style markers or bullet points.
How To Replace Bullet Points with an Image in Blogger (Blogspot)
Sometimes you may prefer to have an image list marker or icon instead of a bullet point. You will need to host your image somewhere such as a free image hosting service eg Flickr or Photo Bucket. Follow the steps below to replace bullet points in your Blogger posts with an image
How to Remove the Bullet Points from Blogger Posts
If you are going for a minimalist look you may prefer to have no bullet points in the lists in your Blogger posts. In this case:
Related Articles
List of Blog Know How Tutorials for Blogger Blogs
How to Add CSS Styling to Blockquotes in Blogger
How to Add, Delete or Remove Blogger Image Borders
How to Align and Justify Posts in Blogger
How to Add a Divider Between Blogger Posts
How to Add or Change a Background Image in a Blogger Template
Today you will learn how to:
- change the style of bullet points in unordered lists
- add bullet points to unordered lists if they are absent
- add an image instead of a bullet to lists in your Blogger posts
This tutorial is rated easy and is designed so that even Blogger newbies can make the changes they want to their Blogger template. Changing the bullet point style involves changing the CSS styling in your Blogger template (Blogspot template). Join me as I walk you through this step by step guide.
How to Add Bullet Points to a Blogger Post
If you are still using the old Blogger editor you will need to add bullet points manually to any unordered lists you create in Blogger posts. If you are using the new editor the work is done for you. Either way though this is the type of code that generates unordered lists:
<ul><li>Create your own list markers in Blogger</li>
<li>Create unordered lists in Blogger</li>
<li>Create bullet points in Blogger</li>
</ul>
Any text can be placed between the two <li></li> tags. Simply copy this list into a Blogger post and substitute your text for mine and you will have an unordered list.
Circular Bullet Points
Circular bullets (also known as markers or discs) are displayed in Blogger by default whenever unordered lists appear. This means that whenever the <ul></ul> tags are used in Blogger posts a leader dot or disc will appear before each line of text denoted by <li>. (Note I will discuss ordered lists <ol></ol> tags in part two of this tutorial).
An unordered list in a Blogger post using the <ul></ul> tags would appear like this:
- Change Bullet Point Style in Blogger
- Add Bullets to Blogger
- Changing the look of unordered lists in Blogger

We can make lots of changes to the look of these filled discs or filled circles by changing the CSS styling in Blogger. For instance we can have squares, or we can choose to have no bullet point at all. Here's how.
To Add Square Bullet Points to Blogger (Blogspot)
The following code will replace the filled circle bullet points with squares instead:
- Login to Blogger if not already logged in
- From the Dashboard go to Design >Edit HTML
- Back up your template
- Find the posts section of your CSS stylesheet which will be before ]]></b:skin> tag
- For the following default Blogger templates eg "Simple" add the following CSS code to the post section like this
.post ul li {
list-style: square;
}
- Save template and view blog post to see the circular bullet points have been replaced by square ones

To Add Circle Bullet Points to Blogger (Blogspot)
To add unfilled circle list markers or bullet points to Blogger posts do the following:
- Follow steps 1-4 as per square bullets
- Add the following code to the posts section of the CSS stylesheet of your Blogger template by entering the following code:
.post ul li {
list-style: circle;
}
- Save the changes to your template and view a blog post to see the empty circle bullet points

How To Indent Bullet Points in Blogger
There are two ways to increase the indentation of list style markers or bullet points.
- Using the Inside or Outside Element
The indentation of bullet points can be varied using the "inside" element. By default the list will be "outside" unless the "inside element" is used. The following code shifts the indentation of the list further to the right..post ul li {
list-style: circle inside;
}
- Custom Indentation CSS Styling
It is also possible to add custom indentation styling to lists. For instance here I have added a 2.5em indent using the following code to the circles example:.post ul li {
list-style: circle;
margin-left: 2.5em;
}


How To Replace Bullet Points with an Image in Blogger (Blogspot)
Sometimes you may prefer to have an image list marker or icon instead of a bullet point. You will need to host your image somewhere such as a free image hosting service eg Flickr or Photo Bucket. Follow the steps below to replace bullet points in your Blogger posts with an image
- Follow steps 1-4 as per square bullets
- In the CSS styling of the posts section of your Blogger template and before the </head> insert the following code:
.post ul li {
list-style: url("http://URLaddressofImage.gif");
} - Replace URLaddressofImage with the URL address of the image you have uploaded to an image hosting service. Note in most cases the file will have a .gif extension. If the extension is anything other than .gif you will need to change this too.

- Save the changes to your Blogger template and navigate to a post page to see your image list marker installed

How to Remove the Bullet Points from Blogger Posts
If you are going for a minimalist look you may prefer to have no bullet points in the lists in your Blogger posts. In this case:
- Follow steps 1-4 as per square bullets
- In the CSS styling of the posts section of your Blogger template and before the </head> insert the following code:
.post ul li {
list-style: none;
}

Related Articles
List of Blog Know How Tutorials for Blogger Blogs
How to Add CSS Styling to Blockquotes in Blogger
How to Add, Delete or Remove Blogger Image Borders
How to Align and Justify Posts in Blogger
How to Add a Divider Between Blogger Posts
How to Add or Change a Background Image in a Blogger Template
Memperindah Kotak Comment Blogger/Blogspot Dengan CSS
Cara ini saya dapat setelah sedikit belajar otak-atik CSS dengan teman karena pengen banget membuat kotak comment (yang sebelumnya terkesan "biasa" di dalam template Blogger ini) terlihat lebih "berwarna" dan "senada" dengan warna template blog ini.
Akhirnya kita menggunakan konsep frame untuk menghias sekeliling kotak comment tersebut. Caranya pun sangat sederhana dan mudah. Berikut
Akhirnya kita menggunakan konsep frame untuk menghias sekeliling kotak comment tersebut. Caranya pun sangat sederhana dan mudah. Berikut
Sabtu, 25 Desember 2010
FACEBOOK WARNING!: Jangan Klik "Seorang Gadis Bunuh Diri Karena Status Ayahnya"
Sebelumnya, saya baru saja menemui kondisi ganjil dan mencurigakan setelah terus-terusan mendapat pop up chat dari account teman saya yang berbunyi begini:"Is this you?"Kemudian di bawahnya ada link aplikasi yang disisipkan:http://facebook.com/xxxxxxxxxxxxxxx Begitu terus hingga berkali-kali. Setelah saya buka, aplikasi ini tidak jelas sebagai aplikasi apa dan terlihat aneh karena meminta banyak
18 Fakta dan Dampak Facebook yang Mungkin Anda Belum Tahu
Seperti yang sudah banyak diketahui, Facebook adalah situs social network yang memiliki user terbanyak di dunia. Ada beberapa hal yang menarik yang patut kita ketahui dibalik hingar-bingar dan popularitas situs jejaring temuan Mark Zuckerberg ini, diantaranya adalah:Jika Facebook adalah sebuah negara, maka Facebook adalah negara terbesar kelima setelah Cina, India, Amerika, dan
Free Sitemap Submitter | SEO Tools
Sitemap (peta situs) merupakan rujukan bagi search engine dalam melakukan crawling sebuah website/blog. Maka, proses indeks menjadi lebih cepat dan tidak ada url/halaman yang terlewatkan oleh spiderbot (robot crawler). Tentu saja, sitemap kemudian menjadi sangat penting bagi usaha peningkatan SEO.
Sitemap submitter dapat memperpendek waktu kerja pendaftaran sitemap blog/web ke beberapa search
Jumat, 24 Desember 2010
30 Fakta Menarik Seputar Dunia Internet
Mungkin sebagian fakta atau trivia di bawah ini sudah anda ketahui, tetapi tetaplah fakta-fakta ini menarik dan bisa memberi gambaran ke kita mengenai dunia internet sesungguhnya. Ini dia:
Penemu frase World Wide Web (WWW) adalah Tim-Berners-Lee pada tahun 1990.
Penyebaran Internet di dunia dengan capaian 50 juta pengguna adalah yang tercepat, yaitu hanya dalam 5 tahun, dibanding radio
Penemu frase World Wide Web (WWW) adalah Tim-Berners-Lee pada tahun 1990.
Penyebaran Internet di dunia dengan capaian 50 juta pengguna adalah yang tercepat, yaitu hanya dalam 5 tahun, dibanding radio
Cara Membuat Blog Gratis di Blogger/Blogspot & WordPress
Cara membuat blog sekarang ini jauh lebih mudah. Memulai blog dengan layanan dua raksasa blogging: Blogger dan WordPress, merupakan awalan yg baik. Meskipun ada puluhan situs penyedia layanan dan hosting blog gratis lainnya di seluruh dunia.
Blog semakin menjadi media ekspresi di internet yang paling booming. Ada jutaan blogger di dunia; rata-rata memilki eksistensi yg bisa dibilang bagus.
Paket Internet Unlimited GSM Three (3), Lemot kah?
(Review Paket Internet Unlimited GSM Three pada ZTE MF-100 GSM USB MODEM)Berbagai macam paket internet unlimited ditawarkan oleh berbagai operator/provider di Indonesia, baik yang berbasis CDMA ataupun GSM, dengan harga paket yang beraneka macam dan dengan kelebihan serta kelemahannnya masing-masing.
Kali ini saya ingin mereview Paket Internet Unlimited Three. Pada dasarnya saya belum
Kali ini saya ingin mereview Paket Internet Unlimited Three. Pada dasarnya saya belum
Cara Mempercepat Koneksi Internet Speedy
Mungkin banyak yg berlangganan speedy (terutama paket personal) mengeluh karena koneksinya yg saat ini terhitung lambat.Namun jangan kawatir, saya memiliki beberapa tips yg saya dapat dari hasil browsing serta informasi yg saya dapat dari teman-teman blog lainnya. Cara ini sudah berhasil saya terapkan untuk mempercepat koneksi speedy saya.Salah satu caranya adalah dengan mengutak atik
Rahasia: Fungsi Lain Google Search Engine
Banyak dari kita menggunakan mesin pencari Google sehari-hari tetapi apakah anda tahu bahwa google juga merupakan alat yang ampuh untuk hal-hal lain? Ada beberapa trik sederhana namun hebat hasilnya yg dapat digunakan ketika mencari dengan menggunakan fitur-fitur Google. Kita lihat yuk!
1. Gunakan Google sebagai kalkulator.Google telah memiliki built-in calculator, dengan memasukkan
1. Gunakan Google sebagai kalkulator.Google telah memiliki built-in calculator, dengan memasukkan
Kamis, 23 Desember 2010
3 Cara Membuat Artikel Blog Dalam 10 Menit
Mungkin sobat tidak percaya setelah membaca judul dari posting ini. Masa sih membuat artikel blog hanya dalam waktu 10 menit? Tapi saya akan berusaha sekuat tenaga hingga bisa meyakinkan 100 persen dengan 3 cara berbeda berikut ini:
1. Cari artikel-artikel blog mancanegara atau news terbaru, pilih artikel yg menurut sobat menarik banyak pembaca. Tidak perlu membaca isinya karena itu akan
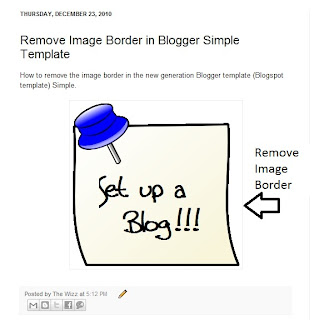
Remove Image Border in Default Blogger Templates Simple and Awesome Inc
In this Blogger tutorial I show you how to remove the border around images in Blogger posts (Blogspot posts) when using one of the latest default Blogger templates Simple or Awesome Inc.
Below I explore two methods of removing or deleting image borders in the Blogger template Simple. The first method shows you how to remove the image border using Template Designer and the second method outlined describes how to remove the image border manually by changing the code.
Method 1 - Use Template Designer to Remove Image Border in Blogger
Method 2 - Change Template Code to Manually Remove Image Border from the New Default Blogger Templates
In this Blogger tutorial (Blogspot tutorial) I have shown you how to remove or delete the border around images in Blogger posts for the newest generation of default Blogger templates Simple and Awesome Inc. I have discussed two different methods to remove the border around the images either by adjusting the settings in the Blogger Template Designer or by manually changing the code of the variable in the CSS styling section of the default Blogger template
Related Articles
List of Blog Know How Tutorials for Blogger Blogs
How to Change or Remove Blogger Image Borders (Part 1)
How to Change the Blog Title Border in Blogger Minima Template
How to Add CSS Styling to Blockquotes in Blogger
How to Align and Justify Posts in Blogger
How to Add a Divider Between Blogger Posts
How to Add or Change a Background Image in a Blogger Template
If you are using an older generation Blogger template or a custom template the solutions contained in this article may work for you however it is more likely that you will need to follow the methods to remove image borders outlined in my previous Blogger tutorial Change or Remove Blogger Image Borders (Part 1)
Below I explore two methods of removing or deleting image borders in the Blogger template Simple. The first method shows you how to remove the image border using Template Designer and the second method outlined describes how to remove the image border manually by changing the code.

Method 1 - Use Template Designer to Remove Image Border in Blogger
- From the Blogger Dashboard go to Design > Template Designer
- Then select Advanced > Images
- Under Border Color use the drop down arrow to open the color palette
- Change the setting to transparent by checking the small box on the bottom right hand side marked "transparent"

Note: If you are using the black version of the Awesome Inc template you will need to change the Background Color to transparent too. Click on the down arrow of the color palette and select transparent.
- Click Apply to Blog to save your changes to the template
- Navigate to any post page to view images in posts without the border


Method 2 - Change Template Code to Manually Remove Image Border from the New Default Blogger Templates
- From the Blogger Dashboard go to Design > Edit HTML
- Back up your Blogger template
- Find this line amongst the declared variables at the top of your template
<Variable name="image.border.color" description="Border Color" type="color" default="transparent" value="#cccccc"/>
- Change to the value of the border color to transparent like so
<Variable name="image.border.color" description="Border Color" type="color" default="transparent" value="transparent"/>
- Save your changes to the template
- Navigate to any post page that has an image and see that the border around the image is no longer visible
In this Blogger tutorial (Blogspot tutorial) I have shown you how to remove or delete the border around images in Blogger posts for the newest generation of default Blogger templates Simple and Awesome Inc. I have discussed two different methods to remove the border around the images either by adjusting the settings in the Blogger Template Designer or by manually changing the code of the variable in the CSS styling section of the default Blogger template
Related Articles
List of Blog Know How Tutorials for Blogger Blogs
How to Change or Remove Blogger Image Borders (Part 1)
How to Change the Blog Title Border in Blogger Minima Template
How to Add CSS Styling to Blockquotes in Blogger
How to Align and Justify Posts in Blogger
How to Add a Divider Between Blogger Posts
How to Add or Change a Background Image in a Blogger Template
Rabu, 22 Desember 2010
Deja Vu: Mimpi Atau Kenyataan ya?
Sepertinya kata deja vu sudah tidak begitu asing bagi telinga kita. Bahkan kita tidak jarang membicarakan fenomena ini dengan teman-teman kita. Suatu ketika, dalam suatu kesempatan, mungkin kita atau salah satu dari teman kita nyeletuk, "Eh, tau gak, rasanya kok aku kaya udah pernah ngalamin ini ya sebelumnya. Persis banget loh! Aku kaya udah pernah duduk persis di kursi ini, kamu di depanku,,dan
Senin, 20 Desember 2010
8 Alasan Mengapa Kita Harus Punya Account Facebook
(Artikel ini dibuat berdasarkan pengalaman pribadi, maksudnya pengalaman orang bernama lengkap Pribadi Sekali. Enjoy!)
Facebook menjadi sebuah account wajib dipunyai? Kenapa enggak? Berikut setidaknya 8 alasan penguat mengapa sobat Blogger semua harus punya account Facebook. Tentunya selain buat sharing Artikel n Blog yah. Hehe, selamat menikmati.
1. Gratis. Kata ini selalu berada di rating
Facebook menjadi sebuah account wajib dipunyai? Kenapa enggak? Berikut setidaknya 8 alasan penguat mengapa sobat Blogger semua harus punya account Facebook. Tentunya selain buat sharing Artikel n Blog yah. Hehe, selamat menikmati.
1. Gratis. Kata ini selalu berada di rating
Minggu, 19 Desember 2010
9 Fakta Unik & Menarik dalam Dunia Sepakbola
Berikut adalah fakta-fakta menarik. unik, sekaligus lucu dari dunia sepak bola. Sebenarnya ada banyak lagi, tetapi kalo dimasukkkan di dalam list tidak akan selesai dan terus bertambah. Trivia di bawah ini adalah sebagian kecil dari banyak item yg saya kumpulkan dari sumber-sumber mancanegara. Semoga tidak repost (hehe, kaya bahasa forum aja. :D ). Selamat menikmati!
1. Tayangan sepakbola pertama
1. Tayangan sepakbola pertama
Sabtu, 18 Desember 2010
9 Fakta Tentang Kandungan Buah Anggur dan Manfaatnya
JIKA anda adalah orang yang sangat memperhatikan kesehatan, maka mengetahui nilai kandungan gizi buah anggur sangatlah penting. Selain memiliki rasa manis dan segar, anggur mengandung banyak vitamin, mineral, & antioksidan. Berikut beberapa fakta buah anggur yg mungkin belum banyak diketahui:
Anggur memiliki banyak kandungan antioksidan seperti antosianin, flavonol, geraniol, linalol, nerol dan
Kamis, 16 Desember 2010
BidVertiser: Cara Mudah Dapat Uang dari Blog/Web
Membuat blog kita menjadi ladang uang memang gampang-gampang susah. Program PPC (Paid Per Click) memang bisa dibilang sebagai program paling gampang sebagai alat untuk mencari uang . Yang paling terkenal adalah Google Adsense. Namun program satu ini emang menggemaskan, karena tidak gampang untuk mendapatkan approve (atau istilahnya ijin) dari Google untuk menjadi salah satu Publisher (baca:
Senin, 13 Desember 2010
Motivasi: Menyusun & Merangkai Langkah Masa Depan
Setiap pribadi adalah unik. Setiap pribadi adalah menarik. Bahkan ketika kita melihat diri kita sebagai jiwa yang lelah, masih ada celah pemantik: hati yang selalu bersenandung dalam perih yang menggigit.
Semua ada setapaknya, dengan liku yang tak berbatas, dengan lebar yang tak terukur, dengan lubang yang tak terduga.
Namun pasti ada penunjuknya.
Jiwa yang lelah bukan berarti jiwa yang sakit.
Semua ada setapaknya, dengan liku yang tak berbatas, dengan lebar yang tak terukur, dengan lubang yang tak terduga.
Namun pasti ada penunjuknya.
Jiwa yang lelah bukan berarti jiwa yang sakit.
Jumat, 10 Desember 2010
Cara Memasang Meta Tags di Blogger/Blogspot
Meta tag berfungsi untuk memberikan informasi kepada search engine mengenai gambaran dan isi suatu blog/website. Blogspot/Blogger dengan template bawaan/official biasanya belum memiliki meta tag ini, oleh karena itu, untuk mengoptimalkan pencarian di search engine (SEO), meta tag perlu ditambahkan.
Meta Tag Description
Meta tag description digunakan untuk memberikan gambaran umum mengenai isi
Meta Tag Description
Meta tag description digunakan untuk memberikan gambaran umum mengenai isi
Cara Memasang / Meletakkan Widget Berdampingan
Banyak dari kita para blogger yang ingin widget kita terpasang dengan baik, tidak memakan tempat terlalu panjang, sehingga enak dilihat dan terkesan rapi. Salah satu caranya adalah dengan membuat susunan widget tersebut secara berdampingan.
Secara singkat kita bisa menyusun widget berdampingan dengan memasang kode HTML tabel.Berikut ini kodenya:
Secara singkat kita bisa menyusun widget berdampingan dengan memasang kode HTML tabel.Berikut ini kodenya:
| kode widget | kode widget
Kamis, 09 Desember 2010Cara Membuat Read More/Baca Selanjutnya di Blogger dan Wordpress
Suatu posting utuh yang memakan tempat terlalu panjang di halaman utama terkadang membuat pengunjung merasa tidak sabar. Padahal mereka ingin segera melihat daftar posting yang lain di bawahnya. Pengunjung tidak mau tahu tentang hal ini, walaupun mungkin di sidebar halaman tersebut terdapat ruang navigasi untuk daftar posting, kategori, dan lain-lain yang bisa membawa pengunjung ke judul posting
Senin, 06 Desember 2010Recent Ads for Cattle Visions
Last week we talked about contract discounts for clients who book all of their print advertising through RHD, and one of those volume clients we work with is Cattle Visions, http://www.cattlevisions.com/. We just wrapped up two monthly ads for Cattle Visions that will appear in the January 2011 Angus Journal. Check it out and see what you think! As a reminder, our volume discount applies to those clients running at least 6 print ads through RHD in calendar year 2011, and the pricing gets better the more ads you hire us to do.
  How to Remove or Change the Blog Title Border in Blogger (Blogspot) - Minima Template
In this Blogger tutorial I discuss how to change the blog title border color or remove the border in a Blogger template (Blogspot template) by changing either the CSS styling of the border manually or by using the Blogger Template Designer feature.
Lots of bloggers have updated their Blogger template to the new default series of Blogger templates for 2010. There are however many of you who are still using the default Minima template from 2006 (and there are lots of good reasons to do so) so this tutorial is for you and anyone else who is using a custom Blogger template based on Minima. You will learn how to change the border styling around the blog title to suit your individual requirements. You can either change the border color or remove the border altogether. If you want to remove the border around images in Blogger posts (Blogspot posts) then please refer to my Blogger tutorial How to Add, Change or Remove the Border Image in Blogger Posts Remove or Change the Blog Title Border in Blogger (Blogspot) There are two simple ways to remove the border around the blog title in Blogger. We are going to hide the border rather than actually remove the code that creates it by making the border color transparent. I will also show you how to change the border color. Method 1 discusses how to do this using the Blogger Template Designer while Method 2 describes how to change the blog title border manually by changing the code.  Method 1 - Using Blogger Template Designer
Method 2 If the Blogger Template Designer is not working on your template for some reason you can tweak the code in your template to remove the border around the blog title
Tips and Troubleshooting Below are some tips to help you further customize the blog title border width. You can either remove the inner border, thicken the outer border or thicken both borders around the blog title in Blogger.
In this Blogger tutorial you have learned two methods to change the color of the border around a blog title in Blogger blog (Blogspot blog). I have also shown you how to increase the size of the border width. This tutorial applies particularly to the default Blogger template Minima but also is relevant for any blogger using a custom Blogger template based on Minima. Good luck! Related Articles List of Blog Know How Tutorials for Blogger Blogs How to Add CSS Styling to Blockquotes in Blogger How to Add, Delete or Remove Blogger Image Borders How to Align and Justify Posts in Blogger How to Add a Divider Between Blogger Posts How to Add or Change a Background Image in a Blogger Template Sabtu, 04 Desember 2010List Pencuri Konten Buka-Rahasia.Blogspot.comPost ini dintensikan sebagai bagian dari daftar lengkap blog-blog yang memuat artikel-artikel buka-rahasia.blogspot.com tanpa memberikan linkback / tidak me-linkback dengan benar. Apapun tujuan dan alasannya, memuat dan mengakui karya orang lain adalah pelanggaran hukum dan norma. Secara etis, blogging ditujukan untuk menyampaikan kreativitas menulis. Saya sangat memerangi copas tanpa link Jumat, 03 Desember 20102011 Ad Contracts - Volume Discounts
We just started working on lots of ads for the January 2011 publications, hard to believe it's almost 2011!
If you are planning on running at least 6 ads in 2011, talk to us about volume discount pricing on RHD handling all of your print advertising needs. We offer two levels of bulk discounts for clients depending on the # of print ads you plan on using in 2011. Our volume ad pricing range from 15% to 33% off from our regular pricing, as a way to reward those clients who do lots of business with us and use RHD for ALL of their print advertising needs. If you're interested in learning more, talk to Rachel, Tricia or Stacey Forgason at 979-532-9141 and we'll be glad to discuss the contract pricing with you! Kamis, 02 Desember 2010November Updates Report
Each month I like to brag on the wonderful ladies in the RHD web division, and this month is no different. We like to keep our clients (and potential clients) informed of our quality of work in web updates to help illustrate the huge commitment we have to providing the best customer service in the business.
In the month of November, our web division handled 414 update request, that's an average of about 20 per day. 95% of all updates were completed on the same day the client requested them. The average turnaround time was 45 minutes. Of the 5% of people that didn't get their update done on the same day, they were done on the very next day, and all of these were all ones sent in over the Thanksgiving holiday when we were closed. So technically, they were done on the very first day we opened back up. There's a lot of things that help make RHD the best in the business. First of all, our design quality is tops. But we realize there are a lot of designers out there, and we feel that our quality of work COMBINED with our service is what makes RHD excel. We have a friendly staff who is all here to assist you. Even with 400 web site clients, each person's web site is a priority for us, which you can clearly see here by the 45 minute average turnaround on web sites. If you've been thinking about trying RHD, give us a call! We'd love to start doing a web site (or any other project) for you! 979-532-9141. Rabu, 01 Desember 2010Best of the Barns 2010 AwardsHere's how it works.... Each year we will be hosting the Best of the Barns awards program. This year there are 30 categories ranging from Livestock Friend of the Year to Best Way to Kill Time at the Barn. The questions are tailored to the national livestock show industry, but most of the focus is on cattle and hogs. For the first year, we determined the categories from a consensus of our expert consultant panel, who helped us create the categories and questions. So, if we missed something, feel free to write it in. For future years, we'll be happy to add any categories or responses that our fans suggest. So here's how you vote! In the style of modern reality shows, you can vote a few times. First, you can complete the entire survey at once by visiting http://www.bestofthebarns.com/ and clicking on the online survey link. Only one response per computer. We will also have voting going on daily at the RHD facebook page. Each day we will post one of the categories and our fans can "LIKE" the choice they want to vote for. Voting is open December 1-31. Results will be tabulated and announced in January. The winners in 2010 will receive a winners media kit including logos and other tools to use in their marketing campaigns. So feel free to share the news with your friends and let's honor those who are the BEST OF THE BARNS in 2010! Selasa, 30 November 2010What we like to hear!
We got this email last week from Jeff Schroeder, who recently used RHD for an email blast for his site http://www.showcattle.com/
"Just wanted to say that blast was one of the highest ROIs we’ve had on a marketing campaign in a long time. It paid for itself in just under 48-hours and that doesn’t take future subscription renewals into account." Then, we also just got this email from Katy Kemp, our contact with ABS Global who just started using RHD. "Thank you and everyone at RHD for helping make these a success. This is the 6th (final) eBlast, but with the results we have seen we will most likely be using the list again this spring!" Now that's what we like to hear!!!! If you aren't on our RHD mailing list, you can sign up from our facebook page (Join my List tab) or at http://www.ranchhousedesigns.com/ at the very bottom right hand corner of the page. We take a lot of pride in our email marketing services. First off, we were one of the first in the business to offer this tool back when it was a new service. Secondly, we feel we have the best targetted email list in the show cattle business....and e-mail's like Jeff's affirm that. We currently have about 13,000 subscribers. All of our subscribers are voluntary, up to date addresses. After each e-mail blast we remove the bad addresses and bounced back emails so this is a very accurate and udpated count of the actual number of subscribers. Our list grows daily. Literally. We average anywhere from 10-50 new people signing up each week for our email lists. We also have a strict policy against spam. Everyone who signs up for our list does so voluntarily, and can leave at any time. Because we hate useless spam just as much as the next person. If you're on our list, you've also probably noticed that we have been sending out a few emails for ABS. They recently chose RHD for their sire marketing e-mail blasts. This year at Louisville Katy Kemp, one of their team members, told us they had already had several people stopping by the ABS booth to say they enjoyed getting the new email blasts on the ABS sires. E-mail marketing is hot! You can reach nearly twice as many people as what many of the popular show cattle magazines have as subscribers.....for about 1/4 of the cost. E-mail blasts run from $150 to $250 depending on the amount of design work we need to do. If you have an ad or flyer already designed by us, or anyone else, you can send an RHD e-mail blast for $150. If we do a new design for you specifically for the e-mail blast, it's $250. Plus, e-mail marketing is the fastest way to get your news out to a huge number of people at a very affordable cost. Holiday Cards
For a couple of years we have been a distributor of the Tiny Prints products as well as creating our own custom holiday cards. I'm not going to lie, I've had mine done for a while, I'm an over-achiever. I did Brandon and I some custom holiday cards - of course with a picture of a cow on them - and I'm just waiting til an appropriate time to send the out so I don't look too ansy.
There are SO many cute cards in the Tiny Prints collection, you can shop til you drop. If ordering holiday cards is still on your to-do list, check out the collection here. This one is one of my absolute favorites...it even comes with a ribbon! If you like this one just go to Tiny Prints and then in the search field search item 21150.   We're going to keep picking out a few each day with some different suggestions. Oh I love Christmas! Senin, 29 November 2010The Show Text! I Like It!
Obviously this is nothing new, The Show Text has been around for quite a while. So I'm behind on the trends, I know, I know. During Louisville I really noticed the excellent coverage that The Show Text provided through Facebook and Twitter. Then over the Thanksgiving holiday, I really appreciated getting their posting of different sale results. So, this weekend I signed up. If you haven't really taken a look at this service, it's a great idea. It's $20/year. You sign up for what kind of news you want and then The Show Text will text you news, show results, sale results, etc. You get to customize what information you want, so you're not getting bombarded with text messages of stuff you're not interested in. For example, you can choose to get info on only specific breeds, or only show and sale results from a certain state, etc. It's really an innovative service, and so far I really like it.
I'd also like to just say how impressed I am with the innovation of The Show Text's creators. I'm pretty sure the founders of The Show Text are former junior livestock exhibitors, who came up with a really creative way to start a business that also provides a great service to all of us who love showing. So check it out if you haven't......http://www.theshowtext.com/ Jumat, 26 November 2010Thankful!
This time of year makes everyone at RHD especially mindful of all of the blessings we have to be thankful for! Just a few things that top our list of things we are appreciative of....
Selasa, 23 November 2010Dr. Hesby's Book is Now Available!!
Hot off the press! The highly anticipated book "Big Hands, Big Heart" is ready! And how coincidental...just in time for Christmas! The form will soon be available on the A&M Animal Science web site but I went ahead and put it up here for a link in case anyone wanted to do some "pre Black Friday" shopping ha ha
http://www.ranchhousedesigns.com/Hesby/hesby-form.pdf The book will be available to anyone making a contribution of $25 or more to the Howard Hesby Atrium Fund. All contributions of $25 or more will receive a copy of “Big Hands, Big Heart” a tribute to Dr. Hesby and can be claimed as a charitable contribution on an individual’s itemized tax return less $9.00 for the value of the book received. Additional copies of the book require an additional $25 donation. Here is a preview of the book.....  On a side note, this is the first BOOK we've ever designed at Ranch House. It was fun and easy to do. So maybe we've found a new service to offer...book publishing :) Family Photo Session — The Gertsons — Wharton, TexasThis fall we did a great photo session for one of our special Wharton friends, Emily Gertson. Emily has been a client of RHD for a few years, when we created a logo for her husband Kris' construction company. Since then we have designed a few different invitation projects for this great family.
This year, RHD will be designing the Gertson's Christmas cards and so we did a family photo shoot to take the photos to go on their cards. These photos were done by our photographer Stacey Shanks of Stacey Shanks Photography. We can't wait to get to work on their Christmas cards. There are so many great shots we couldn't just pick one favorite!!           Senin, 22 November 2010Show Champions Internship
Looking for a great internship at major stock shows? Show Champions USA is looking for interns for the 2011 San Antonio and Houston stock shows. Students can apply and work both shows if their school schedules will allow. Katina Costerisan is asking that applications and questions be directed to her, katina@showchampions.com.
Application deadline is December 10th with phone interviews being held the following week, and notification of internship placement by December 29th. On a personal note, I know several college students who have worked for Show Champions as interns over the past few years. They say it's a great way to gain experience in the photography sector and also some relaly good business contacts. You'll meet tons of people. If you're interested in photography, there may even be some opportunities to build your portfolio and make a great professional contact with the rest of the Show Champions team. They're tops! Plus, you get to hang out at a stock show all day and GET PAID for it :) Seriously, if it wasn't just for college students, I'd sign up! Show to Win on Facebook
We just created a new page on facebook for Show to win -- http://www.facebook.com/pages/Show-to-Win -- check it out and if you like it...then "Like It". Next week we'll start our weekly give-a-ways and launch the new web site for show to win.
Anyone else get this Louisville scam?
This is totally our own fault, but this weekend Brandon and I got a phone call about a "free vacation grand prize give-away" scam from something we picked up at Louisville. Wondering if anyone else had this?
When we were walking through the trade show, Brandon dropped a business card at one of the trade show vendors booths that was giving away a free drawing. We didn't think much of it, lots of booths have those drawings. Then Friday, he got a phone call saying he WON the prize from the drawing at Louisville. The person calling said that his card was drawn at Louisville stock show and he had won a free trip to Disneyland, Daytona Beach, and a Nascar event for ourselves and another couple. The caller asked if his spouse was around to confirm the trip. Since I was at work, the caller said they would call back on Saturday at 9:00 a.m. with our official information about the prize. Of course, we're both thinking this is too good to be true, but whatever, we'll see what they have to say when they call. Well on Saturday morning, me and Brandon were hanging out at the showbarn and the lady called back again, at 9:00 a.m. on the dot. Brandon was on the other side of the barn from me, and the lady insisted we both be there for the "official prize call" so she said she would call back at noon. Well as noon rolled around, we had just finished working some bulls when Brandon's phone rang. Caller ID unavailable. We remembered it was our prize. So Brandon puts her on speaker phone and she starts telling us about how we won from the drawing at the Louisville stock show. She's like all super nice and saying how we are ranchers, we probably would love a vacation, they love it when people from the Louisville show win, bla bla bla. She starts off by telling us we won a 3-part vacation for us and another couple. The first segment is 5 days 4 nights at the Ramada Inn MainGate Orlando Florida plus 2 free tickets to Disneyland, and free shuttle service and meal money. From there, we go to Daytona Beach for a few days. Then from there, we can choose a "bonus trip" ranging from a Nascar event to Vegas. So she says we don't have to say the dates or the name of the other couple, just whether we want the trip or not. She says it has to be used sometime within the next 18 months. Then she starts pressing us do we want the trip or not. I asked, how much does it cost us? Then she said that it's totally FREE, except we have to pay a $400 "promotional fee" plus any hotel taxes, which are usually $10 a night she tells us. Plus we also have to pay for our own travel to get there. Starting to sound weird. Then I asked her, when do we have to pay? Then she says RIGHT NOW, with your CREDiT CARD, then you just call us whenever you're ready to take the trip. Brandon says he doesn't think we can agree to that at this moment, and then suddenly her tone totally changes. She snaps at him something like "Well fine then, take care" and hangs up. Just for fun, we looked up the Ramada Inn Main Gate hotel she told us was the five star hotel that we had won these luxurious accommodations for.....the nightly rate was $45/night. Minggu, 21 November 2010How to Highlight Author Comments in Blogger Posts
In this Blogger tutorial I will show you how to highlight the author comments section of your Blogger template (Blogspot template) using CSS styling.
Benefits of Adding CSS Styling to Author Comments If you are using a default Blogger template chances are it is difficult to differentiate between comments made by visitors and comments made by you, the blog author. If you only have a few comments per post that may not be enough of an issue for you. If however, you have some posts with lots of comments you may need to make your remarks stand out from those of your visitors. We can do that by adding CSS styling to highlight your author comments. What Will I Learn in This Tutorial? In this Blogger tutorial you will learn how to easily add some highlighting to your comments so that they will never get lost in the crowd again. This requires a small amount of tweaking to your Blogger template which is not difficult to do if care is taken. The image below shows one example of what can be achieved using this Blogger hack and some CSS styling.  Will This Blogger Hack Work on My Template? I have tested this Blogger hack on both the old generation of Blogger templates (Minima and Sand Dollar) and the latest generation of default Blogger templates eg Simple. It will also work on custom templates as the comments code is likely to be very similar. If you are using a custom Blogger template and run into difficulty you can also try this alternative method to highlight author comments in Blogger posts How to Add CSS Styling to Author Comments in a Blogger Post The following instructions will highlight author comments in the comments section of a Blogger post. The code creates a shaded box around the comments made by the blog author. These changes will not affect the CSS the styling of any of the other comments made. Instructions to Add CSS Highlighting to Author Comments in Blogger
Alternative Method to Add Highlighting to Author Comments in Blogger The following method will also add highlighting to author comments in Blogger and can be used if you have difficulty with the first method. It does however involve changing some code rather than just adding some so this is not as desirable in terms of future proofing your template for Blogger updates. 
In this Blogger tutorial you have learned two different methods to add CSS styling to highlight the author comments in your Blogger posts. Obviously there is still some work to do on your part to adjust the colors in the CSS styling to match the color scheme of your blog. Good luck! Related Articles List of Blog Know How Tutorials for Blogger Blogs Embedding a Comment Form Below Each Post How to Get More Comments on Your Blogger Blog Add Missing Embedded Comment Form to Blogger Sabtu, 20 November 2010RHD Clients in the NAILE Trade Show
We had a great time strolling through the trade show and chatting with all of the RHD clients that were participating in the NAILE trade show. If I had to guess, I'm sure lots of you also stopped
by these booths....it seems like they were packed every time I walked by. Our leading lady of fashion - Randa Yezak with the Southern Jewlz booth. Of course I had to purchase something from there :) Congratulations Randa on all of your business success!  We met up with Katy Kemp of ABS Global, a new client we have recently started developing e -mail marketing plans for. Katy reported to us that they had lots of people stop by the booth and say that they loved getting the emails from ABS that were sent out by US! Woo hoo!!! If you haven't signed up for the RHD mailing list, you can easily do it on our facebook fan page (join my list) or at the very bottom right corner of http://www.ranchhousedesigns.com/  Another big hit of the show was SJ Creations! They had tons of awesome custom metal creations on display. These make great ideas for Christmas gifts. Check out all of Stephanie's work at http://www.sjcattlecreations.com/ Our last stop on the trade show tour was at Twisted Stitch. I fell in love with the stuff here!! They had some awesome cattle artwork and also a really neat wooden cattle cutout. They promised us that after Louisville they would be posting these on their web site too. So check out http://www.twistedstitch1.com/. Their stuff is fabulous!  How to Add Internal Links Within Blogger Posts
In the Blogger tutorial I discuss how to add internal links within your Blogger posts (Blogspot posts) to point to either another section within the same post or to another post.
There are lots of times when you may want to direct a reader to a different part of your Blogger post depending on what their needs and interests are. Or you might want to alert the visitor to something significant in a related post. In this article I will show how to make use of internal links both within posts and in Blogger generally. Why bother with internal linking you may be wondering? Well the answer is to improve SEO. Blogs with a good internal linking structure will fare better than blogs that don't link posts. Plus you will be creating an aid to navigation for your reader. On longer posts jumps links to different sections within your post or to other posts mean readers can quickly find the information they are looking for. How to Create Internal Links To Sections Within the Same Blogger Posts How to Create Internal Links To Sections Within Different Blogger Posts How to Create Internal Links To Sections Within the Same Blogger Post Consider the above links. Click on them. Each jump the reader to a different part of this article. This type of internal linking is common practice in website building and can be equally applied to blogs to assist with navigation. How did I create these links? The answer is that I used simple html that anyone can learn in a few minutes. Here are the steps I used to create these links.
How to Create Internal Links To Sections Within Different Blogger Posts Now you know how to create links to sections within Blogger posts let's look at how to create internal links within different Blogger posts. Most of you will be able to create a link to another post in Blogger using the posts editor. You just highlight the text you want and click on the figure eight icon and Blogger creates the link for you. Which is great most of the time. However what if we want to direct the visitor to a particular section of a different post? When you create an internal link it will take the viewer to the top of the page but what if you want them to see something near the end of the article? Well using an internal link similar to what we did to create internal links within the post we can. Say I want to take my reader to a particular post in this case Blogger SEO Tips and Tricks. How would I go about it?
In this Blogger tutorial you have learned how to add internal links to a particular section of a post from both within the same Blogger post and within a different post. By adding internal links you will help your visitors to find their away your blog more easily and access information quickly. You will also be adding to your blog's SEO by linking related posts. Related Articles List of Blog Know How Tutorials for Blogger Blogs Blogger SEO Tips and Tricks
Langganan:
Postingan (Atom)
|


